
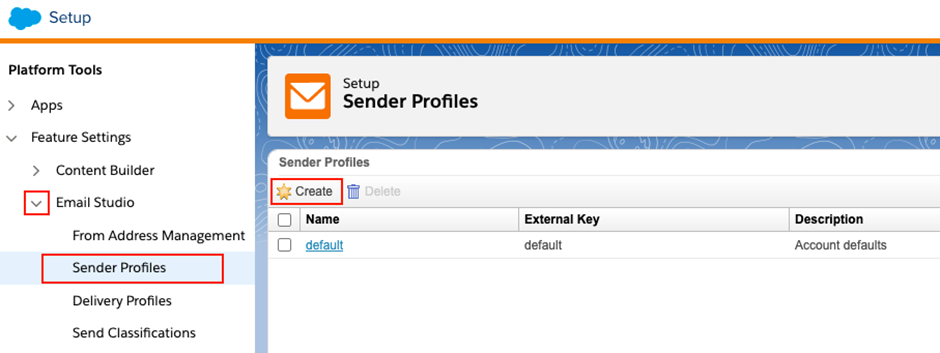
What is a Sender Profile?
Within Marketing Cloud Setup, a sender profile defines the From information for a send in a centralized location. Marketing Cloud Email reuses the information over numerous emails, eliminating the need for selection each time. In the email client of the subscriber, the sender profile includes the sender’s name and address and gives the impression that the message was sent from that person. To set up the sender profile in the Salesforce marketing cloud we need four attributes into our target data extension:
- From Name – This attribute holds the From name for the email message sent to the contact.
- From Email – This attribute holds the From email address for the email message sent to the specified contact
- Reply Name – Specifies if any email response is sent, and to whom shall this be addressed.
- Reply Email – Specifies if any email response is sent, to whose inbox the response arrives.
Use Case: The client requires us to have a dynamic sender profile so at the time of sending, to personalize the communication sent to a user we need to use the Opportunity owner Name and Email is used as the sender address and if responses are received, they should be sent to actual email address.
Special note: If SAP (Sender authentication Package) with a custom domain is used then the email will be something like this:
From Name: Opportunity Owner Name
From Email: OwnerName@e.clientname.com (here e.clientname.com is SAP domain)
Reply Name: OwnerName
Reply Email: ownername@clientname.com (this is the actual email address of the sender)
To Populate the Dynamic Sender profile, follow the steps below
How to build a Dynamic Sender Profile?
The idea behind a dynamic sender profile is to have from Name, From Email, Reply Name and Reply Email addresses dynamically populated. We must specify the “from name” and “from address” in one of the following:
- Sendable data extension: The data extension to which email is sent must have the values in the column.
- Using Content blocks: Using a content block that fires some code in the background.
A. Follow the below steps to create a Dynamic Sender Profile using Sendable Data Extension:
1. Create fields in the sendable data extension:-
When you have multiple sender profiles for different types of subscribers add from name, from address, reply name, and reply address fields in the sendable data extensions to get dynamic or different values in the sender profile. If the source of data is CRM, then follow the steps below:
- Create four custom fields in CRM to store these values.
- Create a flow that updates the value in these fields when a record is updated or created.
Note: The From Address in this field must be updated using something from which we get the Opportunity owner email transformed as SAP validated address.
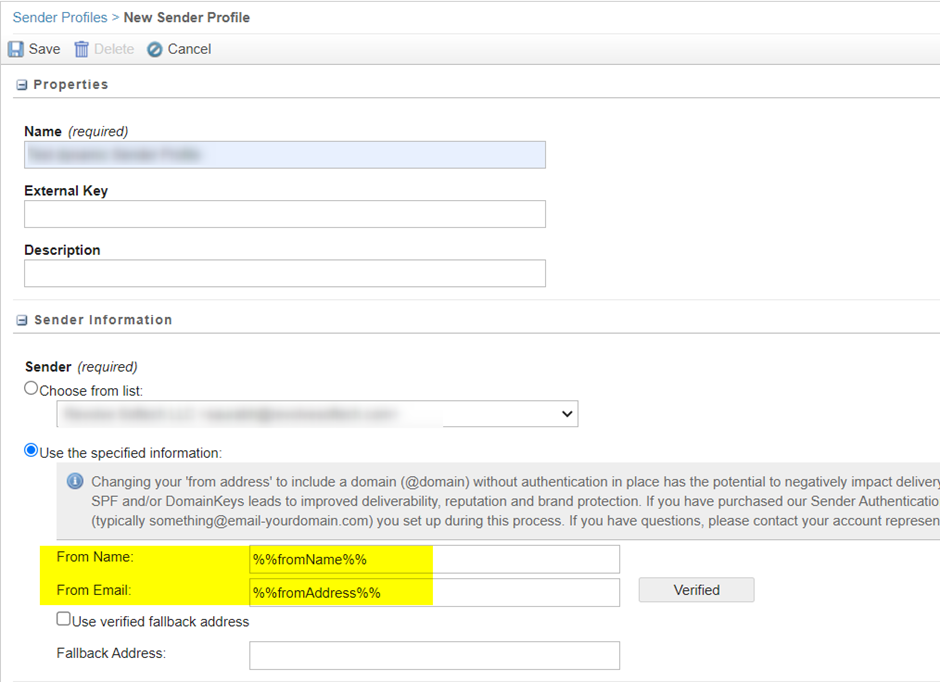
2. Create a Sender Profile:-
Use the following strings while creating a sender Profile (use the field names you have in CRM and the DE that is used for sending):
%%fromName%%
%%fromAddress%%
%%replyname%%
%%replyAddress%%
Note: Use a verified fallback address to make sure even without having the From Address details in the sendable Data Extension will not affect the email sent.
Since the above appoach requires lot of activities on CRM, I propose using the approach below.
B. Follow the below steps to create a Dynamic Sender Profile using Content Blocks:
1. Create a Content Block:-
It contains AmpScript code that retrieves sender information From name, From address, Reply name, and Reply address from a data extension (not a sendable data extension). Use the below code to retrieve data from the data extension.
Code Snippet Block – From Name and Reply Name:%%[
Var @UserId, @fromName
Set @UserId = ‘A’
If not empty(@UserId) then
Set @fromName = lookup("UserSenderProfile", "SenderName", "Id", @UserId)
Else
Set @fromName = "Specific Name"
]%%
%%=v(@fromName)=%%
Code Snippet Block – From Address:%%[
Var @UserId, @fromAddress
Set @UserId = ‘A’
If notempty(@UserId) then
Set @fromAddress = lookup("UserSenderProfile", " SenderEmail", "Id", @UserId)
Else
Set @fromName = "Specific Address"
]%%
%%=v(@fromAddress)=%%
Code Snippet Block – Reply Address:%%[
Var @UserId, @replyAddress
Set @UserId = ‘A’
If notempty(@UserId) then
Set @replyAddress = lookup("UserSenderProfile", " ReplyEmail", "Id", @UserId)
Else
Set @fromName = "Specific Address"
]%%
%%=v(@replyAddress)=%%
To get these content block IDs, go to the content block details in the content builder.
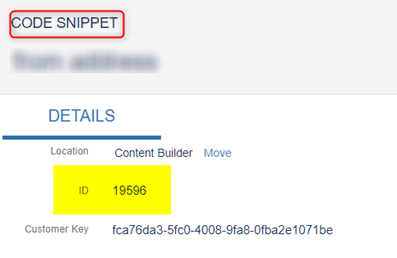
2. Create a Sender Profile:-
With content block ID, set the From name, From address, and Reply name, Reply address use this string %%=ContentBlockbyId(19595)=%% to retrieve block value in the fields while sending emails.

Note: Before using any email address, we have to verify the email domain or the email address else it will pick up the fallback address.
Hope this helps. Please share your feedback in comments.

