Deploy Your First Heroku App /Déploiement de votre première application Heroku

Learning Objectives /Objectifs de formation
After completing this unit, you’ll be able to: /Une fois cette unité terminée, vous pourrez :
- Deploy an application to Heroku with a Heroku Button. /Déployer une application sur Heroku avec un bouton Heroku
- Continue exploring Heroku with your new account. /Continuer à explorer Heroku avec un nouveau compte
Deploying an App to Heroku /Déploiement d’une application sur Heroku
So far you’ve learned what you can do with the Heroku Platform. All along the way we’ve said how easy it is to use, and now you’re going to see what we mean. After this unit, you’ll have a real web application up and running on the Heroku Platform! Don’t worry, we’ll walk you through each step. /Jusqu’à maintenant, vous avez découvert les possibilités qu’offre la plate-forme Heroku. Nous avons indiqué combien la plate-forme était facile à utiliser et vous allez maintenant pouvoir le constater. Après cette unité, vous aurez une véritable application Web exécutée sur la plate-forme Heroku ! Ne vous inquiétez pas, nous allons vous guider à chaque étape
Sign Up for a Heroku Account /Inscription pour obtenir un compte Heroku
To deploy an app on Heroku, you need an account on the platform. It’s quick and easy (and totally free) to sign up. Go ahead and do that now at signup.heroku.com. We’ll wait here. /Pour pouvoir déployer une application sur Heroku, vous devez disposer d’un compte sur la plate-forme. L’inscription est rapide et aisée (et entièrement gratuite). Inscrivez-vous maintenant en vous connectant à signup.heroku.com. Nous vous attendons ici.
Deploy with a Button /Déploiement avec un bouton
After you’re logged in to your shiny new Heroku account, you’ll find yourself in the Heroku Dashboard. It says, “Getting Started with Heroku”. If you’re new to Heroku, select one of the icons that represent your programming language and follow the Getting Started guide to create a new app. /Une fois connecté, le tableau de bord de votre tout nouveau compte Heroku s’affiche. Il indique « Getting Started with Heroku ». Si vous débutez avec Heroku, sélectionnez l’icône qui représente votre langage de programmation et suivez le guide de démarrage pour créer une nouvelle application.
But Heroku offers a way for you to get started even quicker by using a tool called Buttons. With just the click of a button, you can deploy a preconfigured app that has everything it needs, including code, configurations, and add-ons. /Heroku offre toutefois une méthode de prise en main plus rapide en utilisant un outil appelé Buttons. En un clic sur un bouton, vous pouvez déployer une application préconfigurée qui contient tous les éléments utiles, notamment un code, des configurations et des compléments.
By creating your first Heroku app with a button, you get a flavor for how easy the platform is to use. You also get a real, functioning Node.js app that you can explore and modify to learn more. /En créant votre première application Heroku avec un bouton, vous allez constater combien la plate-forme est facile à utiliser. Vous allez également obtenir une véritable application Node.js opérationnelle que vous pourrez explorer et modifier pour mieux la connaître.
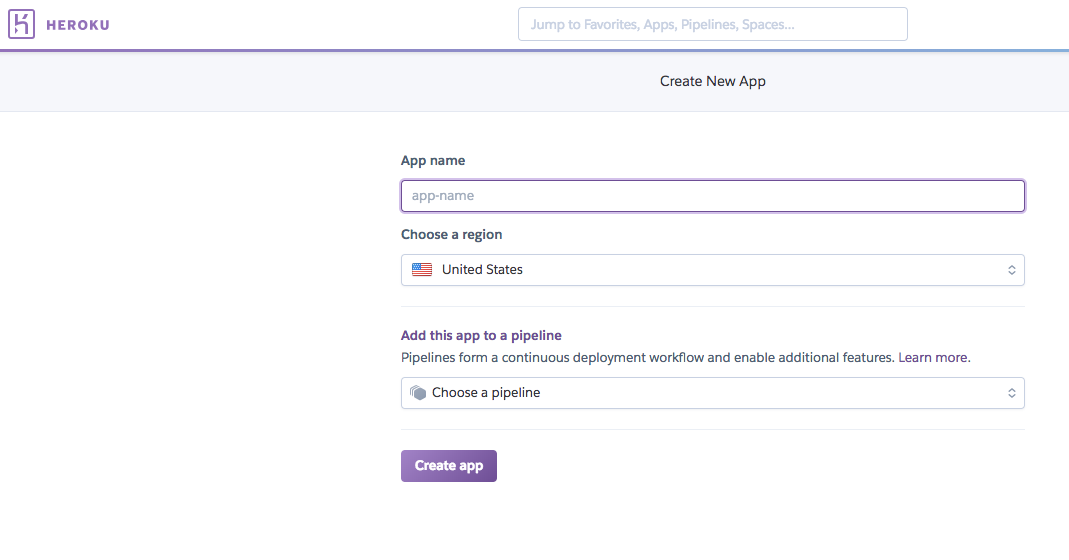
Install your first app by clicking this button: /Installez votre première application en cliquant sur ce bouton :

- Enter a name for your new app, or let Heroku choose one for you. /Saisissez le nom de votre application ou laissez Heroku choisir un nom.
- Select in which region to create your runtime: United States or Europe. /Sélectionnez la zone géographique dans laquelle vous créez votre runtime : United States ou Europe.
- Click Create App to deploy the application. Within a minute or two your app will be up and running on Heroku! /Cliquez sur Create App (Créer l’application) pour déployer l’application. Attendez une ou deux minutes et votre application est opérationnelle sur Heroku !
Click View to see your app in action, running live on the web. /Cliquez sur View (Afficher) pour visualiser votre application en ligne, exécutée sur le Web.
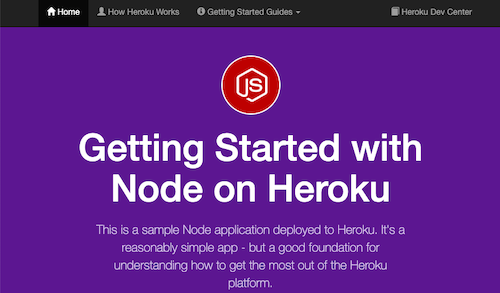
Hello World! Congratulations, you’ve just deployed your first app to Heroku. How easy was that? /Bonjour le monde ! Félicitations, vous venez de déployer votre application sur Heroku. Simple, n’est-ce pas ?
Command Line Included /Ligne de commande incluse
While some developers love the ability to use Heroku through the Heroku Dashboard, others prefer to work on the command line. Heroku provides complete tools for developers in both camps. /Bien que certains développeurs apprécient la possibilité d’utiliser Heroku via le tableau de bord Heroku, d’autres préfèrent travailler avec une ligne de commande. Heroku offre des outils complets pour les développeurs des deux camps.
Heroku’s command-line tools have evolved from the basic commands that developers are already using. The prime example is the most basic Git command: git push. /Les outils de ligne de commande d’Heroku ont évolué depuis les commandes de base que les développeurs utilisent déjà. Un des exemples typiques est la commande de base Git : git push.
A developer using Git for code versioning can type that 50 times a day to store incremental changes to code in a repository. With Heroku, a developer can use that same Git command to deploy code to Heroku, merely by specifying a new target remote associated with their application: git push heroku master. Done and done. /Un développeur qui utilise Git pour contrôler la version du code peut saisir cette commande 50 fois par jour pour stocker les modifications incrémentielles du code dans un référentiel. Avec Heroku, un développeur peut utiliser cette même commande Git pour déployer du code sur Heroku en indiquant simplement une nouvelle cible distante associée à leur application : git push heroku master. Point final.
Heroku’s tools are a collection of command-line incantations and web-based interfaces that distill the hard and complex into the simple, yet elegant. They’re based on what developers already know and love, making it easy — and painless — to start using Heroku. /Les outils Heroku sont une collection d’incantations de ligne de commande et d’interfaces basées sur le Web qui transforment les difficultés et la complexité en simplicité, sans compromettre la présentation. Ils s’appuient sur les connaissances et les habitudes des développeurs, ce qui facilite la prise en main d’Heroku.
You can click Create new app in the Heroku Dashboard, but it’s just as easy with the Heroku CLI command heroku create. Either way, you’d be ready to get to the fun part: writing a custom app in your favorite open-source language. /Vous pouvez cliquer sur Créer une application dans le tableau de bord Heroku, mais il est tout aussi simple d’utiliser la commande de la CLI Heroku heroku create. Dans les deux cas, vous êtes prêt(e) pour la partie amusante : écrire une application personnalisée dans votre langage ouvert favori.
The mission of Heroku is to make developers more productive and powerful, expand what they can do, and to support them in building the unexpected. The Heroku CLI has dozens of powerful Heroku commands. They all start with the word heroku. /La mission d’Heroku est d’accroître la productivité et l’efficacité des développeurs, d’élargir leurs possibilités et de les aider à élaborer des applications hors pair. À cette fin, la CLI Heroku propose des dizaines de commandes Heroku performantes. Toutes commencent par le terme heroku.
After you’ve installed the Heroku CLI, open up a terminal and type heroku help to dig in. If you prefer using the command line over the dashboard, the next section is right up your alley. If you’re not sure, read on and see if you can follow along. If it’s really not your thing, don’t worry! Go ahead and move on to the Challenge if you’re ready for the next unit. /Après avoir installé la CLI Heroku, ouvrez une fenêtre de terminal, puis saisissez heroku help pour explorer les options s’offrant à vous. Si vous préférez utiliser la ligne de commande plutôt que le tableau de bord, passez à la section suivante. Si vous hésitez, continuez à lire ces lignes et essayez de suivre. Si ce n’est pas votre tasse de thé, ne vous inquiétez pas ! Accédez au Défi avant de passer à l’unité suivante.
Try Out the Command Line Interface /Essai de l’interface de ligne de commande
Now that you’ve installed the Heroku CLI, open up a terminal window and type heroku login. /Vous avez installé les outils de la CLI Heroku. Ouvrez maintenant une fenêtre de terminal, puis saisissez heroku login.
The CLI asks you to enter your Heroku credentials, starting with the email address that serves as your username. When you’re logged in, you can always check which user is logged in with the command heroku auth:whoami. /La CLI vous invite à saisir vos identifiants Heroku, en commençant par l’adresse e-mail qui vous sert de nom d’utilisateur. Vous pouvez vérifier tout moment avec quel utilisateur vous êtes connecté en utilisant la commande heroku auth:whoami.
Now you can view some details about your app right in the terminal. To see a list of apps that you can access, type heroku apps. You see some output that looks something like this: /Vous pouvez maintenant consulter les détails de votre application directement sur le terminal. Pour afficher la liste des applications auxquelles vous avez accès, saisissez heroku apps. La liste qui s’affiche se présente comme suit :
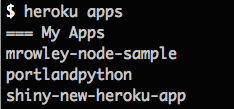
Do you see the name of the app that you just deployed using the Heroku Button? Let’s ask the CLI to share information about your new app. In this example, the app is called shiny-new-heroku-app: heroku apps:info shiny-new-heroku-app. /Le nom de l’application que vous venez de déployer en utilisant le bouton Heroku est-il affiché ? Demandons à la CLI de partager les informations au sujet de votre nouvelle application. Dans notre exemple, l’application s’intitule shiny-new-heroku-app : heroku apps:info shiny-new-heroku-app.
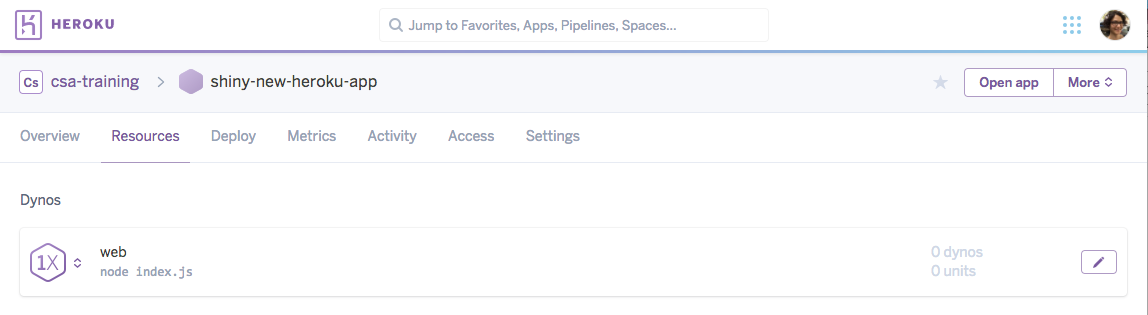
Enter the heroku apps:info command with the name of your app. You see some output like this: /Saisissez la commande heroku apps:info avec le nom de votre application. La liste qui s’affiche se présente comme suit :
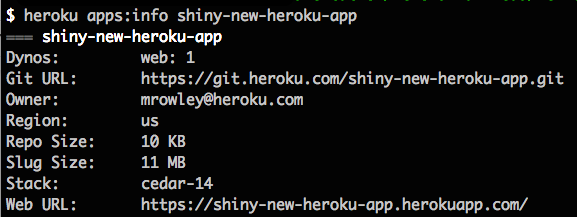
You get a lot of information there about your app. You can see how many dynos (containers) you have running (one dyno of a type called “web”) and the web URL by which you can access your app on the Internet. /Elle inclut de nombreuses informations sur votre application. Vous pouvez voir le nombre de dynos (conteneurs) en cours d’exécution (il s’agit de dynos d’un type appelé « Web ») ainsi qu’une URL permettant d’accéder à votre application sur Internet.
Let’s scale the app down so that it’s not running on any dynos. We’ll use the command line to scale and then we can verify it in the Heroku Dashboard and on the web. Enter the following command: heroku ps:scale web=0 -a <your app’s name>. /Redimensionnons l’application de sorte qu’elle ne soit exécutée sur aucun dyno. Nous allons utiliser la ligne de commande pour l’adapter, puis la vérifier dans le tableau de bord Heroku et sur le Web. Saisissez la ligne de commande : heroku ps:scale web=0 -a <nom de votre application>.
The Heroku CLI gives you some feedback, saying something like, “Scaling dynos… done, now running web at 0:Standard-1x.” Now when you run heroku apps:info with the name of your app, you see that the value for dynos is blank. No dynos are running. If you don’t believe it, have a look on the dashboard! /La CLI Heroku affiche alors un commentaire ressemblant à « Scaling dynos… done, now running web at 0:Standard-1x. » Désormais, lorsque vous exécutez heroku apps:info avec le nom de votre application, la valeur des dynos est vide. Aucun dyno n’est exécuté. Si vous ne le croyez pas, vérifiez sur le tableau de bord !
If the app isn’t running web dynos, what do you think will happen if you try to access the app using its web URL? Go ahead and open your app on the web with the command heroku open -a <your app’s name>. Drum roll… /Si l’application n’exécute pas de dynos Web, que se passe-t-il si vous essayez d’accéder à l’application en utilisant son URL Web ? Essayez : ouvrez votre application sur le Web avec la commande heroku open -a <nom de votre application>. Roulements de tambour…

Oh no! With no web dynos running, your app is not being served on the web. That won’t do, so let’s scale back up to one web dyno using the CLI: heroku ps:scale web=1 -a <your app’s name>. Cross your fingers, count to five, and reload your browser. Your app is alive and well again on the Internet. Phew! /Mince ! Aucun dyno Web n’est exécuté. Par conséquent, votre application n’est pas servie sur le Web. Il faut y remédier : faisons donc en sorte qu’un dyno Web soit à nouveau utilisé en saisissant le code suivant dans la CLI : heroku ps:scale web=1 -a <nom de votre application>. Croisez les doigts, comptez jusqu’à cinq, puis rechargez votre navigateur. Votre application est en ligne et bien présente sur Internet. Ouf !
Now that you’ve deployed an app on Heroku and fiddled with its configuration using the Heroku CLI on the command line, it’s time to push some updates to your app for the world to see. /Vous avez réussi à déployer une application sur Heroku et à adapter sa configuration en utilisant la CLI Heroku sur la ligne de commande. Il est maintenant temps de mettre à jour votre application pour en faire profiter le reste du monde.
Make a Change with the Command Line /Modification avec la ligne de commande
Before you pull down your code to your local machine, create a directory to hold your code. After you’ve created it, open up a terminal window and change to your new directory. /Avant de descendre votre code sur votre ordinateur local, créez un répertoire pour stocker ce code. Une fois créé, ouvrez une fenêtre de terminal, puis changez vers votre nouveau répertoire.
You can pull your code down from Heroku and work on it locally by cloning the app: /Vous pouvez descendre votre code depuis Heroku et travailler dessus localement en clonant l’application :
git clone https://github.com/heroku/node-js-getting-started <your app’s name>
cd <your app’s name>
heroku git:remote -a <your app’s name>
Cloning creates a directory named after your app with its source and complete repository history, as well as adding a heroku git remote to facilitate further updates. /Le clonage crée un répertoire qui porte le nom de votre application, avec sa source et l’historique complet du référentiel, et ajoute un git heroku distant pour faciliter les futures mises à jour.
Now it’s time to make a small change to your app and see that change propagated back to the running application on Heroku. /Il est temps d’apporter une petite modification à votre application et d’observer la propagation de cette modification dans l’application exécutée sur Heroku.
Open /views/pages/index.ejs in your favorite text editor and replace <h1>Getting Started with Node on Heroku</h1> with <h1>My Name is <your name> and I’m Getting Started with Node on Heroku</h1>. Save the file, commit it to git, and deploy the change back to Heroku with the following incantation: /Ouvrez /views/pages/index.ejs dans votre éditeur de texte préféré, puis remplacez <h1>Getting Started with Node on Heroku</h1> par <h1>My Name is <your name> and I’m Getting Started with Node on Heroku</h1>. Enregistrez le fichier, validez sur git, puis déployez la modification sur Heroku avec l’incantation suivante :
git commit -am "my first heroku push"
git push heroku master
You see a lot of text scrolling in your terminal that looks something like the following: /Un long texte semblable au suivant défile sur votre terminal :
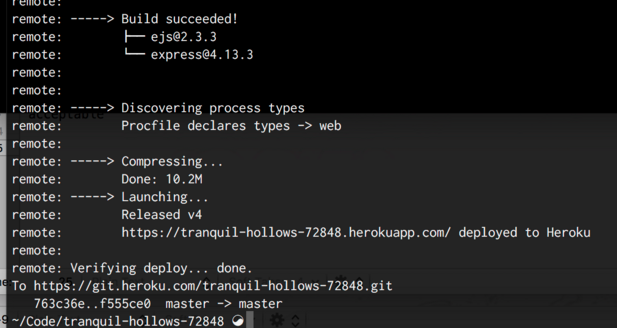
When complete, you and your family and friends should be able to open a browser and see your changes running on Heroku! /Une fois terminé, vous et votre famille, sans oublier vos amis, pouvez ouvrir un navigateur et consulter vos modifications exécutées sur Heroku !